제목 그대로 이번 포스팅에서는 TimelineEntry를 활용해 네트워킹으로 얻어온 데이터를 위젯에 표시하는 방법에 대해 정리하고자 한다.
WidgetKit 문서를 확인해보면 간단한 위젯 동작 원리에 대해 파악이 가능하다. 또한, WidgetExamples에서 다양한 위젯 활용 예시를 확인할 수 있다.
위젯 동작 원리
위젯은 위젯 화면을 언제, 어떻게 갱신하는지를 결정하는 Provider와 위젯 화면을 구현하는 view content로 구성된다.
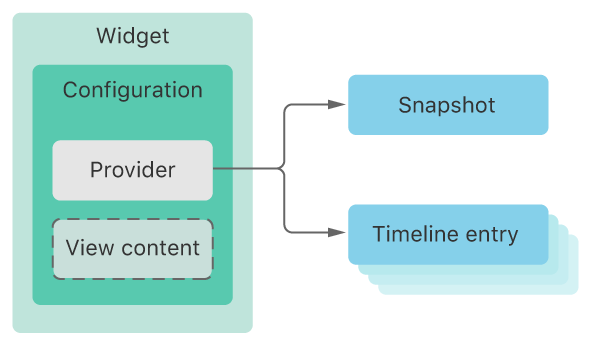
TimelineEntry는 일정 시간마다 위젯에 표시할 데이터를 구조화하는 것을 돕는다. 다음 인용문은 TimelineEntry Protocol Documentation에서 발췌해 온 것이다.
When you declare a structure conforming to TimelineEntry, include any additional information that the configuration’s content block requires to render the widget.
The content block of the widget’s configuration receives the entry as a parameter and then passes the relevant information to the view that renders your widget.
view content는 이러한 entry를 받아 위젯을 렌더링한다. 그렇다면 앞서 말한 일정 시간은 어떻게 지정해주는가에 대해 의문이 남는다.
이러한 의문은 바로 TimelineProvider 프로토콜 내부에 포함된 getTimeline(in:, completion:) 메서드에서 해결해준다. 프로그래머는 getTimeline 메서드를 구현함으로써 갱신할 시간이 담긴 배열을 제공하고, 이 배열을 통해 위젯을 갱신할 시간을 애플리케이션이 파악할 수 있다.
위젯에 네트워크 작업 추가하기
앞서 설명한 위젯 동작 원리에서 네트워크 작업을 어디에서 수행해야 할 지 파악이 가능하다.
읽어오는 데이터는 항상 변할 가능성이 있고, 위젯은 이렇게 변화하는 데이터를 즉각적으로 표시해야하므로 getTimeline 메서드 내부에 네트워크 작업을 포함시켜야 한다.
이를 위해, 우선 네트워크 작업을 수행할 NetworkManager 객체를 생성하였다.
class NetworkManager {
    func fetchData(token: String, completion: @escaping (UserInfo) -> Void) {
        guard let url = URL(string: "your_url") else { return }
        var request = URLRequest(url: url)

        let session = URLSession(configuration: .default)
        let dataTask = session.dataTask(with: request) { data, response, error in
        	let successRange = 200 ..< 300
            guard error == nil, let statusCode = (response as? HTTPURLResponse)?.statusCode, successRange.contains(statusCode) else { return }
            if let data = data, let decodedData = try? JSONDecoder().decode(UserInfo.self, from: data) {
                completion(decodedData)
                return
            }
        }
        dataTask.resume()
    }
}
그 후 Provider에 NetworkManager 객체의 프로퍼티를 생성하고 getTimeline 메서드에 fetchData를 활용해 일정 시간마다 네트워킹 요청을 보내고 데이터를 받아오도록 설정했다.
func getTimeline(in context: Context, completion: @escaping (Timeline<Entry>) -> ()) {
    if let token = UserDefaults(suiteName: "group.com.sbk.todaycommit")?.string(forKey: "token") {
        networkManager.fetchData(token: token) { (data) in
            let entries = [
                UserEntry(date: Date(), id: data.login)
            ]
            let timeline = Timeline(entries: entries, policy: .never)
            completion(timeline)
        }
    } else {
    	var entries: [UserEntry] = []
        let currentDate = Date()
        for secOffset in 0 ..< 5 {
            let entryDate = Calendar.current.date(byAdding: .second, value: secOffset, to: currentDate)!
            let entry = UserEntry(date: entryDate, id: "None")
            entries.append(entry)
        }

        let timeline = Timeline(entries: entries, policy: .atEnd)
        completion(timeline)
    }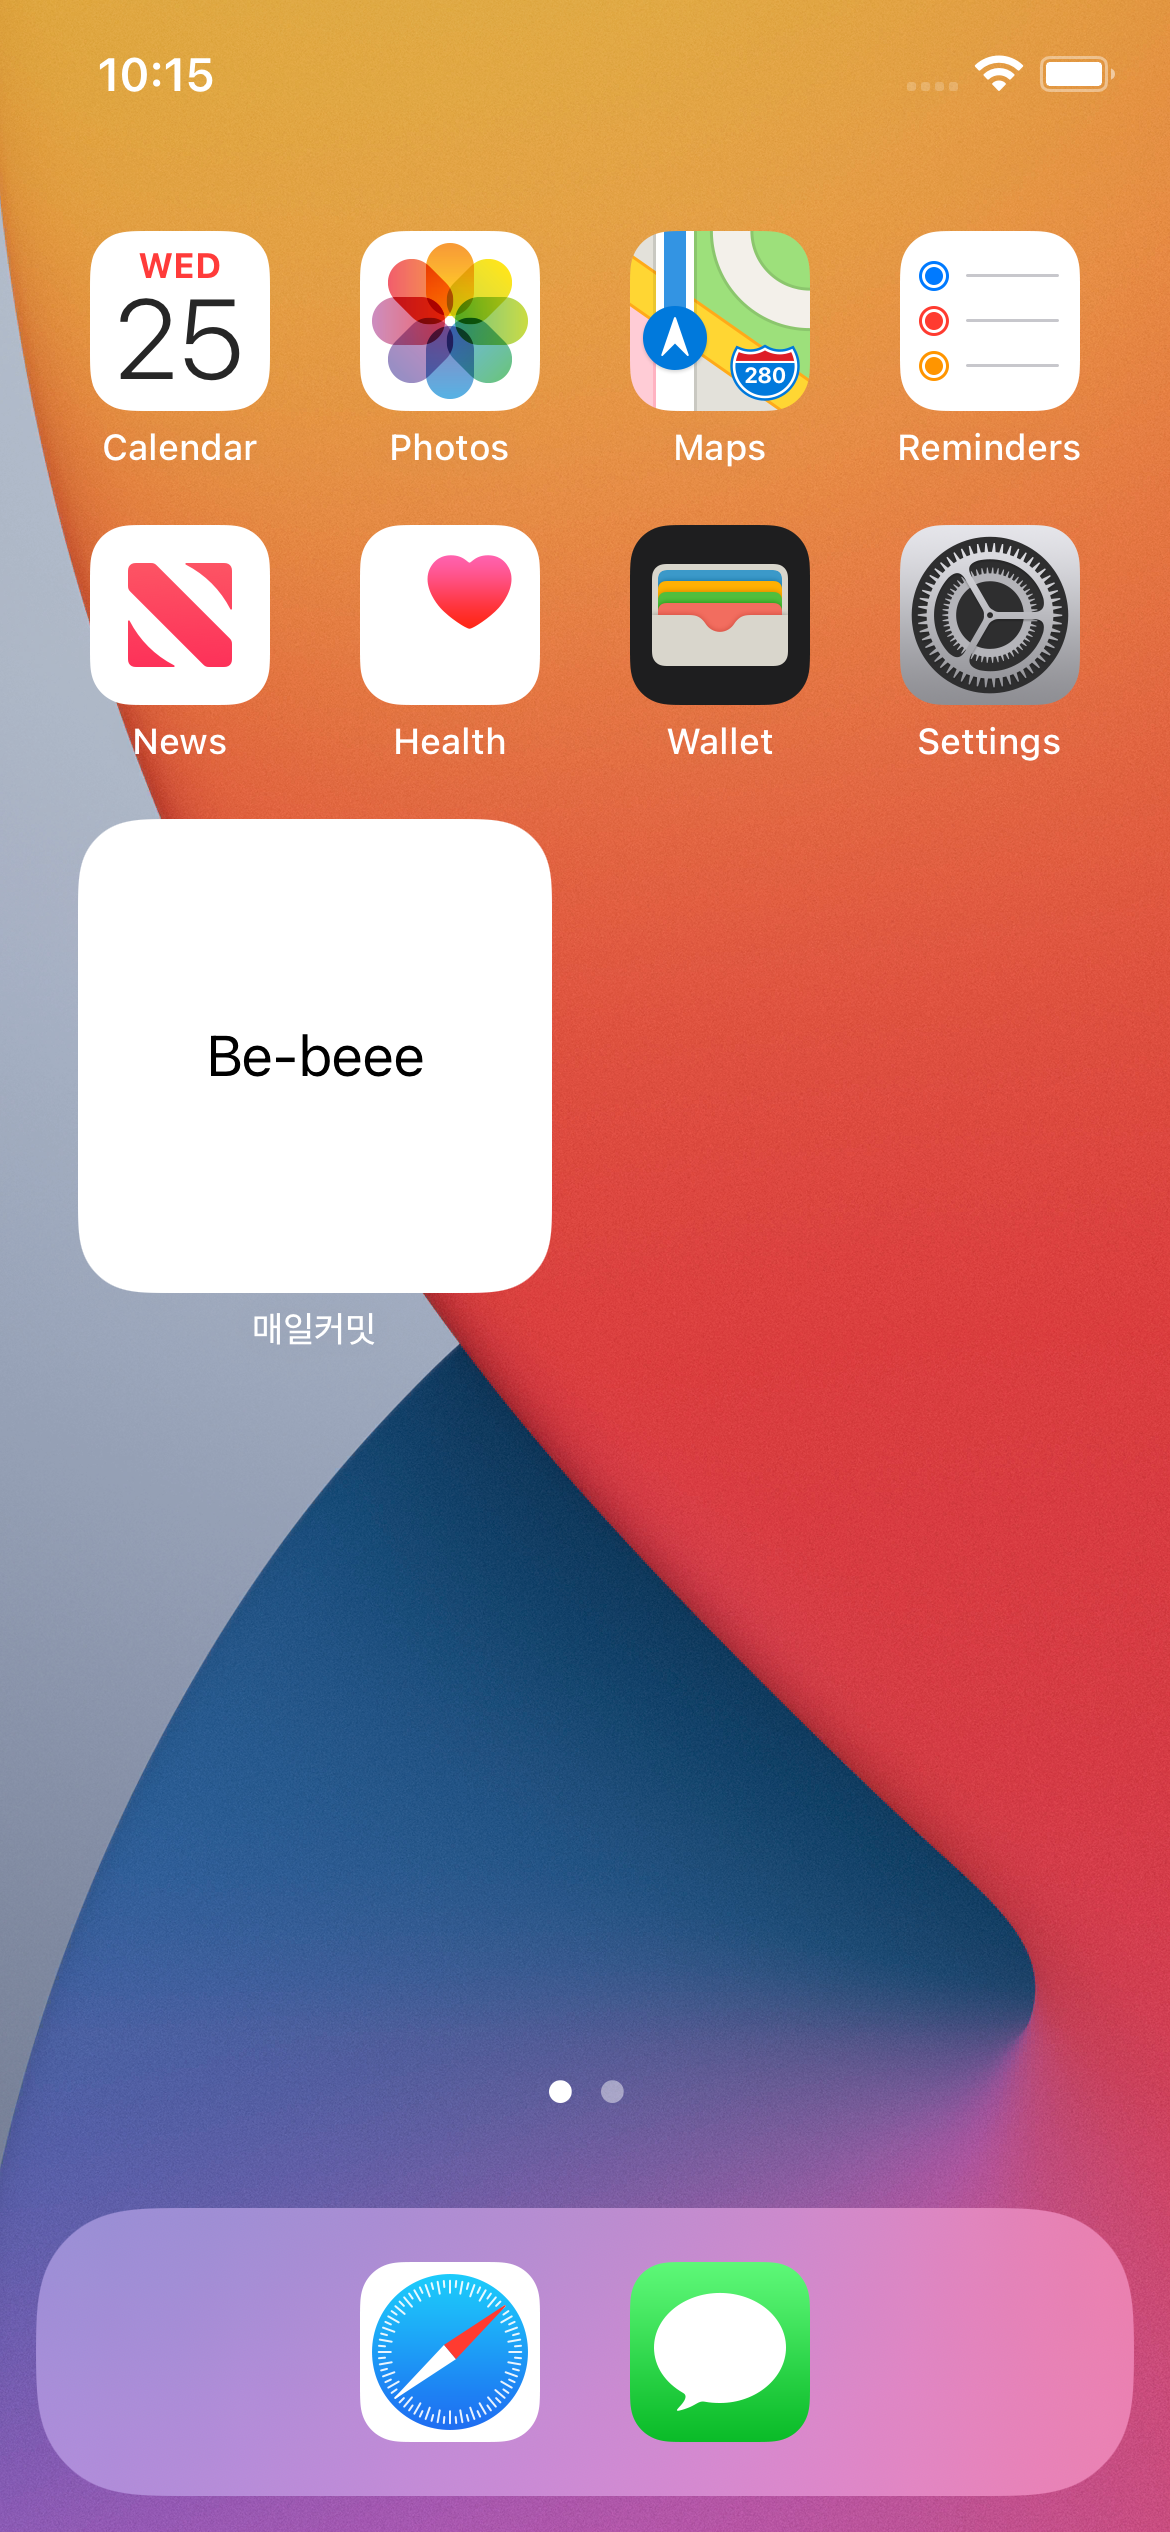
}UserDefaults에 관한 코드 내용은 이전 포스팅에서 확인할 수 있는데, 애플리케이션과 위젯의 공유 컨테이너에 토큰 값이 저장되어 있다면 유저 아이디를 불러오도록 했다. timeline의 policy는 .never로 설정했다. policy의 경우 .atEnd, .after, .never의 3가지로 위젯의 상황에 맞는 갱신 정책을 지정할 수 있다.
이후 실행 결과를 확인하면 정상적으로 위젯에 사용자 아이디가 표시되는 것을 확인할 수 있다.
참고: https://stackoverflow.com/questions/63976424/how-to-refresh-widget-data
https://developer.apple.com/documentation/widgetkit